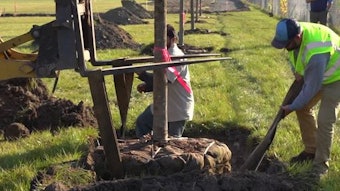
The use of aerators is often a key part of a spring lawn renovation plan. Aerating equipment will help the soil to better accept nutrients and water, providing a lush lawn.
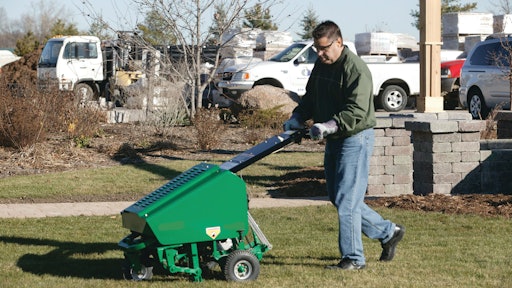
Aerators are available in walk-behind, stand-on and tow (behind lawn tractors or ride-on lawnmowers) models. Attachments are also available. Aerators have either hollow tines that puncture the ground and eject cores of soil, leaving small holes in their place, or spikes that push holes into the soil without removing cores. The small cores produced by hollow tines will typically fade back in a short period of time.
Safe operation or aerating equipment means a healthy lawn and a healthy operator. Follow these tips for safe and effective lawn aerator use.
The right soil conditions
Aerating should only be done to established lawns and large grass covered areas. The ground should be soft and moist. To test the conditions, and to see if watering is needed before starting the aerating, poke the ground with a hand spade. If you can easily penetrate 2-3 inches with little effort, then you are good to go. If it’s a struggle, the lawn requires watering. Watering should be done 1-2 hours before aerating. Avoid aerating if the ground is muddy and soil doesn't easily crumble in your hands.
Added weight
Some aerators come with weights that can be added for improved control and better penetration. They may also feature a designated space to mount your own weights or sand bags. The added weight can be helpful for penetrating heavy, clay-based soil. Check the length of the cores. If the cores ejected are only one inch long, add weight until a core is produced closer to three inches.
Inspect the area and go
Inspect the area and remove any rocks, wire and other objects that could present a hazard before starting. Look for and note any objects that need to be avoided but cannot be removed (sprinklers, valves, etc.).
Once the area is clear and ready to be aerated, start the engine and adjust the throttle to a comfortable walking speed that allows you to maintain control of the equipment at all times. Stop and check over the aerator if you run over or into an object.
Aerate in straight lines whenever possible and avoid sudden turns or maneuvers. As you aerate, move slowly on slopes and work across them rather than up and down. Avoid operating on slope grades that exceed 25%. Do not use the aerator on any surface other than grass and especially avoid running it over hard surfaces like sidewalks and driveways when the tines are down or engaged.
(Click here to read: Get the Most Out of Aerator Tines by Choosing Wisely and Watching for Wear)
Additional Dos and Don’ts
Here are some additional Dos and Don’ts to keep you operating your aerator in a safe and effective manner.
- Do keep unsupervised children and animals away from the equipment at all times.
- Do use safe lifting techniques when loading and unloading equipment from the trailer or vehicle.
- Do keep hands and feet away from moving or rotating parts.
- Do stop the engine when refueling.
- Do check the equipment for any loose or damaged parts before each use and repair when necessary before operating.
- Do remove the spark plug wire before beginning any service on the aerator.
- Don’t leave the machine standing on a slope unattended.
- Don’t run the engine in an area that is not ventilated.
- Don’t remove guards when operating the aerator.
- Don’t modify equipment in any way or use it for purposes other than aerating.
- Don’t remove any warning or safety decals on the equipment. Be aware of their meaning and heed their warning.
Read your safety manual! This is just a quick overview of basic safe operating procedures. As always—read, understand and follow the instructions in your safety instruction manual, along with the various safety symbols and warnings that appear throughout the manual and on the product itself.