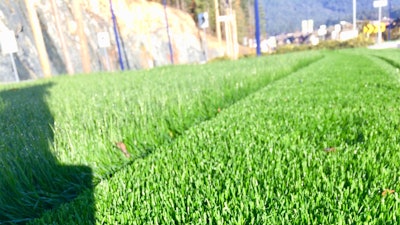
Ensuring that a customer lawn remains in that lush, vibrant condition is generally a part of professional turf managers duties. Sometimes those services elevate to some extensive renovation of the property to ensure the health of the lawn.
 Barenbrug USA
- Determine whether the customer's current stand has the potential to be salvaged (greater than 50% green, healthy growth) or if they have need to consider a complete renovation of the area.
- If they have mostly healthy grass (greater than 70%), there is the option to troubleshoot what they currently have with a fertilizer application. Cain says to promote this quick spurt of growth, apply about 1 pound of nitrogen per 1,000 square feet on the existing grass. If you are using a quick-release fertilizer, you may go with a 50/50 blend of a quick-release and slow-release fertilizer (ex, half urea and half poly-coated urea) to ensure the plant is getting a little help now as well as some in the future as the fertilizer breaks down in the environment.
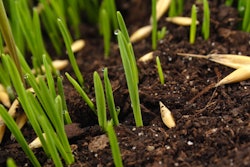
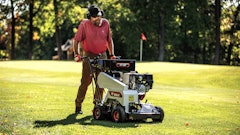
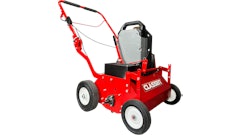
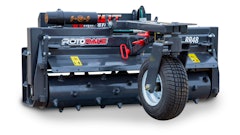
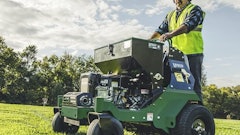
- If there is some healthy grass (greater than 50%) but it is growing unevenly, this may call for overseeding. When this is the case, you may decide to dethatch to get rid of the dead material, rake the seedbed to make it an even surface as well as removing the old debris, then use a drop spreader to apply the new seed on this prepared area. Overseeding rates are usually a little higher than that of a new seeding because this accounts for the seed settling in unintended spaces, and not making soil contact for germination to occur. You may decide to do another light raking once the seed is down to ensure it settles on the soil. Once seeded, this can be lightly top dressed with mulch or peatmoss to introduce more organic matter in the system and retain moisture on the seeds throughout germination.
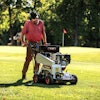
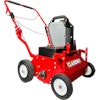
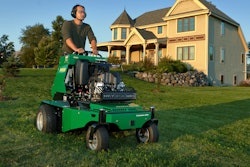
- If there is very little grass worth saving in the current stand, this will call for a complete renovation. The first step in this process is to remove everything that is currently present and prepare the area for new seed. This is typically done with an application of a non-selective herbicide like glyphosate. Glyphosate damage can be seen within one week and plant mortification will occur within about two weeks. Once the turf is sufficiently necrotic, use a dethatcher to remove the dead debris. This may be done over several passes in different directions to remove as much dead material as possible. Rake the dead debris off the area and determine if the area is mainly soil. If there is still a lot of dead material, run the dethatcher over the area again and reassess. At this point, a soil sample may be taken to determine the current soil's pH and nutrient content. This will be the best way to determine whether a pre-plant fertilizer or soil amendments should be made. The goal is to have a higher nitrogen content and to keep the pH between 6 and 8. This is where the most micronutrients will be available to the plant. Make the necessary amendments, create an even surface for the seed to settle with a rake, and then seed according to the recommended rates for the species or blend. Determine the species they currently have and whether it works for them, or will another species fit their need better? If they like what they have, keep with it, but if there is another species that thrives better in their region, make efforts to sway them that direction for a more manageable turf. Once seeded, a light layer of peatmoss or mulch can be spread on top of the seed to ensure seed-to-soil contact and retain moisture throughout germination. An optional step would be to use a heavy roller on top of this area to compact the seed into the ground, this helps keep the seed in place until it takes root and stays in place. Lastly, you will immediately begin the irrigation process by watering lightly enough to moisten the soil and not cause water run-off. The customer will then need to maintain the watering practice of light and frequent bursts (10-15 minutes 2-3 times per day) to maintain soil moisture during germination. Once there is visible germination, if the weather is not drying out the seedbed too much, irrigation can be reduced after ~3 weeks until there is full establishment (after 2-3 months). When mowing can take place, and this is where you can reassess your irrigation needs. There are plenty of extension articles published on watering your lawn based on species, so please refer to these for accurate rates for your region.
Seed or sod
Cain says seed and sod are both viable options for creating a new stand of grass, so it ultimately depends on the time of the project and maintenance.
For example, if there were a large tract housing development that was ready to put new houses on the market and growing in a new stand of grass would take too much time, she notes that sod is a perfect option. Sod will give the immediate satisfaction of a lawn while grass seed takes longer to establish.
Additionally, Cain says when purchasing sod, weeds are of little-to-no concern because those producing the sod are dedicated to maintaining the utmost quality. However, when establishing a lawn from seed, she says sometimes there are dormant seeds within the soil that make an appearance during the grow-in process, or depending on the quality of the purchased seed, there may be weeds present in the bag that you will introduce into the system. “Purchasing quality seed from a reputable supplier is key to a healthy turf stand," Cain says.
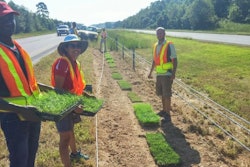
Continuing, she adds that when sod is cut at a sod farm and transported to its final destination, one can see the contiguous root system creating a mat-like appearance. These are essentially "free-floating" roots that need to find a home in soil. To promote rooting that anchors the sod to the soil, cultural practices like fertilization, irrigation, and mowing are key.
After sod installation, it is vital for customers to keep up on these practices and call you back if they are noticing turf grass mortality. “When starting a turf stand from seed, you must be wary of your (customers’) irrigation and fertilization practices,” Cain says. “It is a more hands-on and time-consuming process, but you can almost ‘train’ the grass to be maintained at a certain height, watered at a certain rate, and even grow in difficult spots at a potentially lower price point than sod.”
If you select seeding and you know which company you want to purchase from, one of the best ways to narrow down your species is to contact the company directly if that is not generally your area of expertise. “They will help you determine what species of turf grass will grow and thrive in your given area,” she says. Barenbrug USA
Alternatively, he/she suggests a lot of universities fund agricultural extension offices that are filled with experts knowledgeable on local plant species.
Grasses are generally divided into warm- and cool-season species. Cool-season grasses are generally grown in areas where freezing temperatures are normal through the winter months, while the warm-season grasses flourish in regions with mild to hot temperatures.
In the dark
Multiple factors must be considered when restoring a customer’s property. Shade can determine how any plant, including grass grows.
According to Cain, plants use a series of red and far-red light, and plants will absorb red light while far-red light is reflected. This reflection of far-red light from one plant onto another neighboring plant is how it determines closeness. She says it is similar to when you are waiting in a long line and you can tell how close someone is by seeing or hearing them, far-red light sensing is the same idea. When ample far-red light is being reflected from one plant to another, that is telling the plants that they are close together and are in competition for sunlight, nutrients, and water. “This feeling of competition will then affect how the plant will respond and grow,” Cain says. “This usually leads to limited growth in the plant. When growth is slowed, this makes conditions perfect for weeds or diseases to make an appearance in these shady areas.”
To combat this stunt in growth and future infestations, he/she says it is vital to plant shade-tolerant species or cultivars in these areas. Fine fescues, especially creeping red and Chewings fescues, are notorious for their ability to thrive in the shade and in low fertility soils. Blends containing these species or improved varieties of Kentucky bluegrass, tall fescue, perennial ryegrass, and sometimes Bermudagrass or bentgrass will bring this important attribute to your customer’s stand.
“Once planted in the shade, it is important to keep a close eye on your irrigation, because too much will lead to disease and moss encroachment,” Cain says. “When disease pressure and moss encroachment are high, you may need to aerate your soil, amend with sand or another porous soil to improve drainage, and reseed the area.”
Watering is key
Whether you select seed or sod, providing your customer with the proper instructions to maintain irrigation on the lawn is critical.
She says when watering a new stand of sod, it is important to do one deep watering (0.75 in. to 1.5 in.) right after installation, and then water at a lower rate (0.1 in. to 0.25in.) daily thereafter. Cain notes the single deep watering will allow the water to soak through the mat-like root system of the sod and penetrate down to the native soil. However, she also says the rate at which the first irrigation is applied depends on the outside temperature. If the outside temperature is 95 degrees or warmer, irrigate at the 1.5 in. rate, but if you have cool weather, the 0.75 in. will do the trick.
The thick root system will allow moisture to remain, not evaporating out too quickly, and then the lower rates of irrigation will maintain the moisture through the rooting process. Cain says you or your customers should maintain this lower rate of daily watering for about two weeks, and then gradually reduce to maintain the species of turfgrass at the recommended watering rate.
“Overirrigating will cause water to pool and may lead to root rot, eventually killing your new sod,” XX says. “On the other hand, deficient irrigation will dry out the roots and kill the plant, making it difficult to recover. It is important to find the balance between the two, to maintain a happy, healthy stand.”
When establishing a new stand from seed, it is a somewhat similar process.
She says the seedbed should be prepared by evening out the soil and applying any herbicides or starter fertilizers. Some like to amend the soil with mulch, peatmoss, or a better draining soil (sand), and then begin the seeding process.
Generally, seed is applied to this prepared area, then some more of the mulch, peatmoss, or soil is sprinkled on top of the seed to keep it in place and enhance water intake. Cain notes that a heavyweight roller can be used to roll the seed into the ground to ensure seed-to-soil contact.
After these steps are completed, irrigation should immediately take place. “The goal is to keep the seedbed moist throughout germination to the point where mowing can take place,” she says. For the first 2-3 weeks, depending on the species (fescues and ryegrasses need 2 weeks, bluegrasses will need 3 weeks) a light and frequent watering will take place (0.1 in. to 0.2 in. twice or three times per day).
Cain says once there is visible germination, if the weather is not drying out the seedbed too much, irrigation can be reduced after 3 weeks until there is full establishment (after 2-3 months). When mowing can take place, you can reassess your irrigation needs. Once again, the company you purchased from, or university extension offices can help you customize your irrigation rates based on species and region.
 ©Travis - stock.adobe.com

