With the changing of the seasons come reminders, and not just daylight saving time and spring cleanouts. Your hole diggers will need some due maintenance before you fire them up for the jobs to come.
We won’t be going over self-explanatory steps like putting gas in the tank, reading the manual and have you turned it off and on again, but items like these are just as important. A little vigilance and tending goes a long way for preventing problems down the road, so let’s quickly summarize your checklist for getting those diggers ready for work.
Earth auger or hole digger?
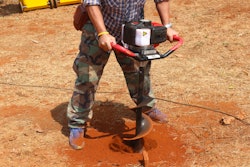
Before digging in too far, it’s good to cover basic terminology to avoid confusion. We refer to the whole machine as the “hole digger.” The “earth auger” is literally the part of the machine that bores into the ground—made up of the hub, axle, flighting, teeth and screw bit. Lastly, we refer to the engine, transmission and operator handles as the “powerhead.”
Making maintenance a fluid motion
Now that the terms are straight, the first step in proper hole digger maintenance starts at the powerhead. Gas isn’t the only fluid you should be keeping an eye on. Whether it’s the start of another season or the first season for your hole digger, check its transmission oil. Due to shipping regulations for the powerhead, the transmission does not come filled with transmission oil. It must be added. Operating without the proper oil levels will significantly reduce overall service life. The same goes for the powerhead engine oil and properly maintained levels. If you’re using a towable hole digger with a hydraulic-powered auger, engine oil and hydraulic fluids must be added and levels properly maintained. Fluids should be replaced after the initial fill based on intervals set by the equipment and engine manufacturers. Its cleanliness is imperative for preventing unnecessary wear. If in doubt, switch it out.
Clean tools for dirty jobs
Obviously, the downside of an earth digging tool is that it will be caked in dirt from time to time. As tidy as we all like to be, it’s not uncommon to put it away without cleaning first. You may simply be out of time. Because of this, one of the most important precautions is to clean off your hole digger and look it over carefully before each use. This allows you to inspect what’s under all the crud. You could find problems such as leaks, cracks and/or severely worn components that can hamper productivity or create an unsafe equipment operating condition. If present, these are all issues that should be addressed before firing up that engine and digging the next hole.
Digging points
Overall wear-and-tear is natural, but there are a few areas to keep a sharp eye on. We’ll start from the bottom and work our way up on parts that typically need special attention. The first is the screw bit, which is the tip of the auger. Its primary function is to begin the soil breakup process and to keep the auger straight on course while it digs. Unsurprisingly, as the lead point of contact, it can often get worn down and used well past its life cycle. If the screw bit is bent or cracked, or the fish tails of the screw bit are worn away, it’s time for a replacement.
Next are the teeth (or blades on some augers), which you can think of like miniature shovels, digging in, lifting and breaking up the soil. If these are worn down or missing, your job of penetrating the ground is going to be a lot more difficult in the end. If you neglect to replace them when needed, the auger’s boring head and flighting will ineffectively take on the brunt of the digging and become extremely worn, eventually resulting in tapered holes, poor cleanout and getting stuck in the ground.
Thankfully, some manufacturers have developed wear indicators. Much like the wear indicators on vehicle brake pads, these will let operators know when it is time to replace the teeth (blades). These indicators will vary, but many brands have their indicators on each tooth’s outside edge and/or there’s a wear hole. Note that the outside teeth in general wear faster because they’re spinning faster than the ones closer to the center of the auger. It’s also important to remember that there will often be a couple different styles of teeth on your auger, so in this case, crack open that manual or visit the website to clarify.
When changing teeth and screw bits, always thoroughly clean the mounting areas. This will reveal potential damage and cracks, ensure a proper fit and minimize future wear from such debris. Some teeth will also have elastomeric and/or rubber inserts with them. These should always be changed with the teeth. The reason is the insert material gets compressed upon installation, with use and, can permanently deform over time.
If the teeth you’re replacing are knock-in style, make sure you wear proper eye protection and use a plastic mallet—not steel or rubber. Place a wood block between the mallet and tooth when striking and never strike the tooth directly because it can break or chip, and the pieces could hit you or others. The raw edges from a break can also become a hazard. Thus, in the interest of fixing things and not making any more problems, play it safe.
Never throttle your maintenance
Throttle controls and cables (some use triggers) are imperative for operation, but thankfully, easier to notice problems on. Test the controls for any sticking or binding that can prevent full range of operation. Check the cables to make sure they aren’t stretched, worn out, damaged or kinked impacting the engine throttle arm operation. If the throttle controls, triggers or cables aren’t functioning correctly, the engine won’t get enough gas or may not shut off properly, especially in an emergency.
Don’t slip up
Last is the centrifugal clutch. It can be hard to tell when it needs to be replaced as the durability of this component has continued to improve over the years. Signs for replacement include the clutch slipping and the auger stalling at full speed or the auger rotating at idle speed when it shouldn’t. Methods can vary when testing if a replacement is needed, so we’ll go through a couple common ways to do so.
With some hole diggers on the market, one simple test is to remove the auger and hold the powerhead up while the engine is idling. The driveshaft should stop rotating at this low engine speed. If it doesn’t, it’s a pretty sure sign that the clutch needs to be replaced.
Another method would be to use a digital tachometer (again, with the auger removed) and to run the hole digger at its specified idling speed to check for clutch engagement (i.e., shaft rotation). There is not a one-size-fits-all approach when it comes to proper idle speed, so be sure to consult the owner’s manual or other manufacturer resources to determine the correct engine idle RPMs.
Ready for the season
While tasks like changing oils are less frequent, don’t forget to keep a watchful eye for cracks, chips or loose parts throughout the season. It may seem a lengthy list to get through before you even start the real work, but taking just a little time to take care of your digger will ensure that you’ll get your money’s worth, less headaches and a hole well-dug.









![Doosan Bobcat Wacker Neuson Stack 2ec Js Pb V6e[1]](https://img.greenindustrypros.com/mindful/acbm/workspaces/default/uploads/2025/12/doosan-bobcat-wacker-neuson-stack2ecjspbv6e1.CPyyz8ubHn.png?ar=16%3A9&auto=format%2Ccompress&bg=fff&fill-color=fff&fit=fill&h=135&q=70&w=240)
