Fall is here, and like it or not, it is time to embrace the cooler temperatures, and in the northern climates, start thinking about getting things ready for winter. This time of year is more commonly referred to as "blowout" or the "winterization" season.
Let's break down the top three items that need and should be done to achieve the best results during the winterization process.
1. Backflow care
Since a backflow device is required on all irrigation systems that are tied into culinary water lines, it needs to be No. 1. There are two options for backflows: a reduced pressure zone and a pressure vacuum breaker. The type of backflow is dictated by site conditions or by a municipal code. These devices are installed above grade, expensive and susceptible to freezing in cold climates.
Physically removing the backflow and storing it in a shop over the winter is the best option to keep it from freezing. If a full removal is not an option, make sure to drain all of the water and leave the two ball valves a quarter turn open and, if possible, open the valve petcocks a quarter turn so if any water is left behind, it has a place to drain or expand.
Wrapping the backflow with heat tape or with some sort of insulation is also a good option if they are going to be exposed to the elements all winter.
2. Blowout the lines
You really should consider the blowout process as an insurance policy for the system. The blowout process uses compressed air to displace the water in the lines and it will greatly reduce the chance of water freezing in the lines and causing major repairs come spring.
For best results, use a large compressor (50-70 gallons) that can keep a continual flow of pressure at 185 cfm or greater. Also, make sure to regulate the pressure coming out to provide 75-85 PSI depending on how big the lines or zones are in the system.
Another good practice is to open a valve, or spigot, before starting the compressor; this will help balance the pressure in the lines upon startup. If the pressure is too high, it can blow heads and valves apart, which is another costly repair come spring.
Finally, keep in mind that the compressed air will displace the water. With just air running through the lines, it will increase the heat in the lines, which can warp pipes and fittings. If you dry run rotors too long, you can heat the wiper seals, and they can warp or melt and cause another costly repair in the spring.
3. The little things matter
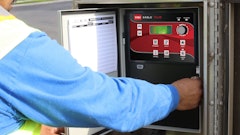
Turn the irrigation timer off during the winter. Be sure that any above-ground heads that potentially could hold water are drained.
Finally, be sure to close any open spigots or drain valves. When valves are manually opened, they tend to get left open, so just double-check that they’re closed before leaving.
Contractors are riding on referrals and reputations to increase their bottom line, so use the winterization process as an opportunity to provide the client with possible fixes or upgrades to their system.
For example, are there components that could be added to the system, like a quick coupler or hose spigot? Are there things within the system that are leaking? Is the pressure through the system too high? Irrigation contractors can also suggest upgrading their timer to a Wi-Fi-based option. This option has many benefits, but from the winterization standpoint, this will allow irrigation professionals to access the timer without someone on the property having to give access, and it’s a time-saver if crew members aren’t needing to find valve boxes and get into them to manually turn them on.
In conclusion, the customers usually don't know what they don’t know, so irrigation contractors should be able to provide solutions that will save them, water, time and money.

